Month: November 2021

LM380/NE5534 Audio Amplifier Complete(ish)

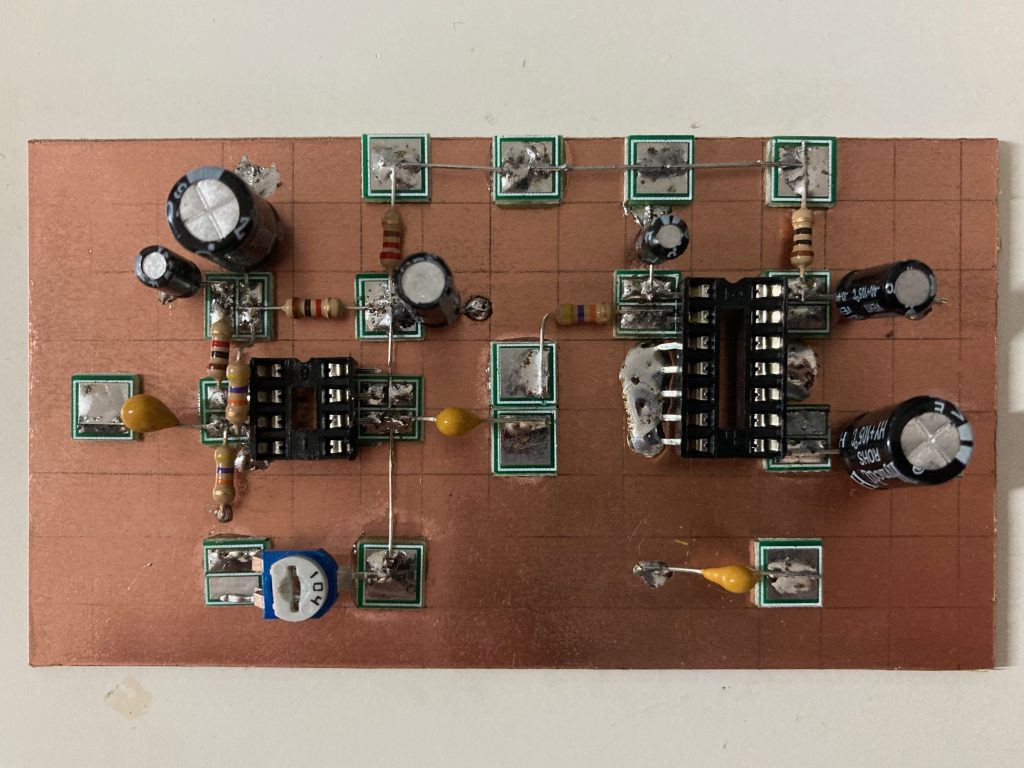
Having put the finishing touches to the audio amp I’ve now powered it up and given it the finger on the input treatment, I get buzzing and can hear a slight increase in noise with volume so it seems to be working correctly.

I need to actually try putting some audio through it, but for now it’s complete and can await the other stages.

LM380 Audio Amplifier

LM380/NE5534 Audio Amplifier

Earlier this week I made a start on the audio amplifier for the Sudden SSB N6QW Transceiver I’m building with the scratch QRP build group, yes another audio amp! I decided on a Manhattan approach using “Manhattan Style Solder Pads” from Kanga Products which are great and allow for a much neater approach than ugly (obviously) and for me a much easier construction style than vero board, which I grew to hate in putting together the audio amp that I built for M0NTV direct conversion receiver which I’m still debugging. One thing I have noticed with Manhattan is that you really do need to get the placement of the pad right first time as the glue sets pretty much instantly, no time for hesitation!

A great thing about the pads from Kanga Products is that they are double sided, one side is a single pad and the other side is split into a double pad, I have found this very useful for various situations where you want to fit a couple of pads close together. The double pads can been seen on my board used for the IC sockets and just above the IC on the left where I have used a double rather than two singles for neatness and to keep the pads compact.

I just need to add a 2r7 on the bottom right, connect up the volume pot, connect up the speaker and add a connection wire, then pop in the ICs and it should be ready to power up!

Scratch Build QRP Project

A little while ago Steve Hartley G0FUW posted to the GQRP reflector that he was thinking of running a small building group for people with zero or very little scratch building experience looking to build a 17m N6QW Sudden SSB transceiver in modules. I expressed my interest along with quite a few others and the group got going with Steve running it along with Nick G8INE.

Steve and Nick compared previous notes and put together a shopping list of items required for the project as well as providing a build techniques guide going through various construction techniques such as manhattan, veroboard, printed pcb…

I’ve got together the various components and have made a start on the audio amplifier, a post on that to follow…

Testing my Direct Conversion Receiver

After completing all the parts to my receiver I took it to the club this week for some more help testing. I knew that the receiver worked when I injected a signal from my NanoVNA, but testing in the real world didn’t yield any results. The club has a signal generator which I used with much assistance to test the product detector.

It turns out that although the product detector works it has horrendous sensitivity, of the level that would require something like a 1KW station across the street to ‘hear’ anything, so more work ahead to diagnose that fault.

In addition to this something went pop in my audio amp yet again. The amp was working, I turned to focus on the product detector then I heard a spark, saw some smoke and the chip was very hot. There is definitely some kind of fault in that audio amp, I think as it’s has so much desoldering, resoldering and adjustment there is probably an intermittent short, or something along those lines…more work to diagnose this fault too.